- See also: Unique Melee.
Melee Weapons[]
Equally effective as backup weapons and main weapons, melee items can be divided into 3 groups: slow,. medium and fast attack speed weapons. Let's take a look at the differences.
Melee weapons have two types of attacks, right and left-click. Both of these attacks deal the same damage and have the same speed, but some may prove better in certain situations than the other. (Such as over the head attack for enemies above the player and on the ground (default Mouse0 ), while the side swing attack (default Mouse1 ) may be useful for infected directly in front of the player.)
Slow attack speed melee weapons (<0.6 attacks per second), have this slow attack speed because they model heavyweight weapons of the real world, but with the benefit of a higher damage, knockback distance and stun duration per hit for the minimum level of the weapon.
Fast attack speed melee weapons (>0.7 attacks per second) model lightweight weapons, able to have a fast attack speed at the cost of a lower damage, knockback distance and stun duration per hit for the minimum level of the weapon.
Medium attack speed weapons (0.6-0.7 attacks per second) being the majority of the melee weapons currently in the game are characterized by their medium attack speed and medium damage, knockback distance and stun duration per hit for the minimum level of the weapon.
All players in Dead Frontier 2 start with a Damaged 2 x 4, which is the weakest melee weapon in the game and due to the damaged status of the starter one, it has random negative stats making it even worse. The 2 x 4 falls into the medium attack speed weapons, doing average damage at an average amount of attacks per second.
Notes about Melee:
- Melee weapons are silent to zombies and thus cause no aggro by their attacks to zombies they did not hit.
- While melee weapons do not have headshot damage bonus, they have the ability to cause sneak damage. (Even without the player investing any skill points into the skill)
- Melee weapons take precise timing and maneuvers to be effective.
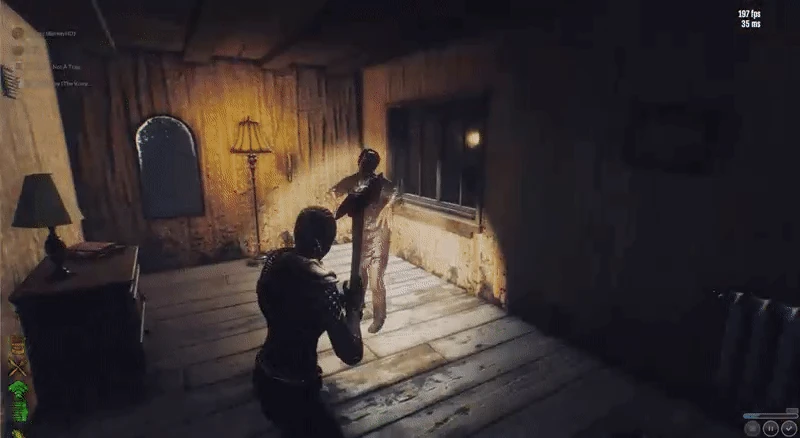
- Worms occasionally spawn out of the corpses of killed infected in level 5+ indoor areas (or out of bosses in areas of any level); the player has a 2 second grace period before they begin attacking after being spawned, it is suggested to move away as soon as the zombie is killed.
Requirements & Recommendations[]
There are no requirements (other than weapon level) to using melee in Dead Frontier 2, it is all about getting used to the way weapons swing, the distance the player's character lunges forward after swinging, the timing of an attack, and the amount of knockback the melee weapon will cause to the infected.
One way should the player decide to make melee their main weapon, is to take the "Brute Strength" perk in the skill tree. What this perk does is increase the stun of infected after being hit with melee, and the distance in which they will stagger backward after being hit. In Dead Frontier 2 knockback distance and the distance between the player and the infected when initiating a melee swing is crucial, even more, crucial if the player is using a low attack speed weapon. If the player initiates the swing while being too close to a zombie and the knockback isn't good enough to increase the distance between the player and zombie after the swing, the player is likely to take damage. The greater the knockback the player can do to zombies when swinging a melee weapon and the longer stun time the zombie endures, the more room for error there is, and the chance of taking damage is less likely.

Another recommendation should the player decide to use melee is the "Quick Reflexes" skill in the skill tree. This skill grants the player the ability to dodge attacks from infected by pressing the space bar. This perk will allow the player to initiate a melee swing and just after making contact with the zombie, hit the space bar and dodge away to avoid damage.
Additional skills such as "Kick Boxing", "Stealth", "Melee Expert" or "Aim for the Heart" can also increase the effectiveness of a melee build, but they may be chosen at the player's discretion.
Melee Combat Without Knockback or Stun[]
Even if you decide to not use any melee perks, melee is still a very viable weapon for the sole fact that it doesn't use any ammo. When using melee without knockback or stun, the way in which you should carry out the swing changes to account for the fact the zombie will remain very close to you even after taking damage. Although this method is useful without having any bonuses, it does not fully substitute for the lack of knockback and stun effect bonuses, therefore your timing of the melee swing, and distance in which you initiate the swing is much more important.
Due to the fact that you cannot back peddle in Dead Frontier 2 unless aiming down sights of a weapon, the spin around tactic proves very useful in melee combat. What this trick consists of, is the moment your melee weapon makes an impact with the zombie you spin completely around so that your character is ready to either jog or sprint forward as soon as the melee animation ends. This allows the player to escape in the direction the use of the dodge skill would take you as fast as possible to avoid taking damage. Maneuverability is key when it comes to melee combat, and the player wants to avoid damage by any means necessary.
Note: While this maneuver is effective, it is highly recommended to avoid attempting this on large hordes of infected that are close together. First attempt to separate the zombies from each other as much as possible.
Due to being limited by their range, melee weapons aren't suitable against all infected and melee combat can become very dangerous when handling sprinting infected, AOE zombies, or zombies that vomit.
Aggro Combat In Single/Multi-Player[]
When it comes to aggro combat in Dead Frontier 2 or large groups of infected in general, melee combat should be avoided completely if these infected are grouped together closely. When swinging any type of melee weapon, the player lunges forward a small distance without being able to move until the animation is completed, that being said if the player swings at the first zombie of a tightly packed horde, the zombies right behind the one that was hit will be able to attack the player.
Tips for using melee[]
- If a zombie begins to sprint at you, do not attempt to attack it while it is aggressive, wait until it pauses for a moment to recharge its sprint and attack them.
- If a zombie is identified to vomit, try to time attacks in between when it attempts this special attack. Should the player have bad timing though, it is possible to interrupt the vomit attack with a well-timed swing leading to the player taking no damage.
- When entering a room, try attacking as many zombies as possible while they are asleep on the floor, each of these is considered a sneak attack and deal significant damage.
Should the player use melee while in multiplayer:
- Be aware of when your fellow survivors are swinging, if they hit a zombie half a second before you and you go into the swing right after, the zombie will not take knockback and likely damage you.
- Try to avoid fighting the same zombie, this can cause some inconsistencies, it is much easier for everyone if each person fights their own zombie unless one person really needs help.
Melee does not cause aggro, using melee will not increase the chance of zombies coming into the room the player is currently in.
Advantages and Disadvantages[]
Advantages[]
- Silent, so do not cause aggro by attacking.
- Due to not requiring ammunition or fuel, they are ammo cost-efficient.
- Able to deal extra damage from sneaking (i.e. crouching behind enemy's back - default hold Control ).
Disadvantages[]
- Very ineffective against bosses, because unlike the regular infected - bosses are highly stun resistant and deal high melee damage themselves.
- May be less cost-efficient in requiring more medicines due to the operator being more exposed to debuffs and incoming damage.
- The least effective weapons for crowd control (Note: You can still take down a horde with melee weapons, but it is slow, inefficient and involves risk).
- In higher-level areas, melee is less viable due to AOE enemies.
Stat Rolls[]
Here is the list of possible additional Modifiers that can be rolled onto Melee weapons when the weapon is looted or enhanced.
- Notes:
- (Weapon) "modifier name" refers to "Weapon modifier name" for weapons and "modifier name" for Clothing items. The prefixed modifier occurs only on weapons, while the non-prefixed one - only on Clothing. The difference between the two is that the non-prefixed one affects the player globally (i.e. any weapon used by the player), while with the prefixed one affects only the individual weapon item on which it is found.
- Having too much of a stat combined from all equipment and Status Effects will cause the stat to be capped at the value shown.
- Legend:
- B base guaranteed detrimental modifier on some items of this type.
- B base guaranteed beneficial modifier on some items of this type.
- R randomly available beneficial modifier on some items of this type.
- U Unique-grade guaranteed beneficial modifier on some Unique-grade items of this type.
| Modifier \ Item | Head | Body | Legs | Hands | Feet | Melee/ Chainsaws |
Pistols/Rifles/ Shotguns/SMGs/ Assault Rifles |
Stat Cap |
|---|---|---|---|---|---|---|---|---|
| (Weapon) Body Damage | R+U | R+U | R+U | R+U | ? | |||
| (Weapon) Attack Speed | R+U | B | R+U | R+U | R+U | ? | ||
| (Weapon) Stun Duration | R+U | R+U | R+U | R+U | ? | |||
| (Weapon) Knockback Distance | R+U | R+U | R+U | R+U | ? | |||
| (Weapon) Surprise Damage | R+U | R+U | R+U | ? | ||||
| (Weapon) Minimum Accuracy | B+R+U | R+U | R+U | ? | ||||
| (Weapon) Maximum Accuracy | B+R+U | R+U | R+U | ? | ||||
| (Weapon) Range | R | R | R | ? | ||||
| (Weapon) Aim Speed | R+U | B+U | R+U | R+U | ? | |||
| (Weapon) Reloading Speed | R+U | U | R+U | R+U | ? | |||
| (Weapon) Ammo Capacity | R+U | R+U | R+U | ? | ||||
| (Weapon) Noise Radius | R | R | R | R | ? | |||
| (Weapon) Headshot Damage | R+U | R+U | R+U | ? | ||||
| Damage vs Humans | R+U | R+U | R+U | R+U | +300% | |||
| Damage vs Infected | R+U | R+U | R+U | R+U | +300% | |||
| Damage vs Mutated | R+U | R+U | R+U | R+U | +300% | |||
| Health | R+U | R+U | R+U | R+U | +300% | |||
| Search Speed | R+U | R+U | R+U | R+U | +300% | |||
| Energy | R+U | R+U | R | R | +300% | |||
| Hydration | R+U | R+U | R | R | +300% | |||
| EXP Gained | R+U | U | U | R+U | U | R+U | R+U | +300% |
| Inventory Capacity | B+R+U | B+R+U | U | R | R+U | +300% | ||
| Incoming Damage | B | B+R+U | B+R | B | B | R+U | R+U | -75% |
| Incoming Stun Threshold | R+U | R | U | R | R | ? | ||
| Incoming Stun Recovery | R+U | R | U | R | R | ? | ||
| Bleeding Chance | R+U | R+U | R | R | -100% | |||
| Radiation Chance | R+U | R+U | R | R | -100% | |||
| Infection Chance | B+U | R+U | R+U | B+U | R+U | R | -100% | |
| Burns Chance | R+U | R | U | R+U | R | -100% | ||
| Movement Speed | B+U | B/B | +50% | |||||
| Jog Speed | R+U | R+U | R+U | R+U | +150% | |||
| Walk Speed | R+U | R+U | R+U | R+U | +200% | |||
| Sneak Speed | R | R+U | R+U | R | +200% | |||
| Sprint Speed | R+U | R+U | R+U | R+U | +150% | |||
| Sprint Duration | R+U | R+U | R | R+U | +200% | |||
| Sprint Cooldown | R+U | R+U | R | R | -75% | |||
| Dodge Cooldown | U | R+U | R+U | R | R | -90% | ||
| Dodge Duration | U | R+U | R+U | R | R | ? | ||
| Health Restoration | R+U | R+U | R | R | +300% | |||
| Energy Restoration | R | R | R | R | +300% | |||
| Hydration Restoration | R | R | R | R | +300% | |||
| Energy Needs | R+U | R+U | U | R | R | ? | ||
| Hydration Needs | R+U | R+U | R | R | ? | |||
| Footstep Noise Radius | R+U | R+U | R | R | -75% | |||
| Visibility Range | R+U | R+U | R+U | R | -75% | |||
| Sneak Visibility Range | R+U | R+U | U | R+U | R | -75% | ||
| Kick Damage | R | R+U | R | R | +300% | |||
| Kick Stun Duration | R | R+U | R | R | +300% | |||
| Kick Knockback | R | R+U | R | R | +300% | |||
| Kick Cooldown | R | R+U | R | R | -90% | |||
| Lockpick Chance | R+U | R+U | R+U | R | +75% | |||
| Vehicle MPH (Miles Per Hour) | U | ? | ||||||
| Find Ammo Chance | R+U | U | R+U | U | R | R | +300% | |
| Find Food Chance | R | R | R | R | +300% | |||
| Find Book Chance | R | R | R | R | +300% | |||
| Find Backpack Chance | R | R | R | R | +300% | |||
| Find Upgrade Chance | R | R | R | R | +300% | |||
| Find Drink Chance | R | R | R | R | +300% | |||
| Find Fuel Chance | R | R | R | R | +300% | |||
| Find Clothing Chance | R | R | R | R | +300% | |||
| Find Weapon Chance | R+U | U | U | R+U | R+U | R | +300% | |
| Find Medical Chance | R+U | U | U | R+U | R | R | +300% | |
| Find Common Item Chance | U | ? | ||||||
| Find Superior Item Chance | R+U | R+U | R+U | R | +300% | |||
| Find Rare Item Chance | R | R | R | R | +300% | |||
| Find Elite Item Chance | R+U | R+U | R+U | R | +300% | |||
| Find Unique Item Chance | R+U | R+U | R+U | R | +300% |
List of Melee Weapons[]
| 2 x 4 | ||||||||||||||||||||||||||||||||||||||||||||||||||||||||||||||||||||||||||||||||||||||||||||||||||
|---|---|---|---|---|---|---|---|---|---|---|---|---|---|---|---|---|---|---|---|---|---|---|---|---|---|---|---|---|---|---|---|---|---|---|---|---|---|---|---|---|---|---|---|---|---|---|---|---|---|---|---|---|---|---|---|---|---|---|---|---|---|---|---|---|---|---|---|---|---|---|---|---|---|---|---|---|---|---|---|---|---|---|---|---|---|---|---|---|---|---|---|---|---|---|---|---|---|---|
|
Equipment Slot: Weapon Level Required: 1 Weapon Type: Melee Body Damage Per Hit: 2 Attacks Per Sec: 0.67 (medium) Stun Duration: 0.75s Knockback Distance: 0.75m Noise Radius: 0m Surprise Attack Damage: 10 Effective DPS: Body: 1.34 Scrap Value: $24 |
A 2 x 4 might not seem like the most practical weapon, given it's size and weight, but on the streets filled with the undead, anything becomes a tool for survival. Surely a concussion won't bother the infected, but if you hit them enough times, you're sure to drop any of them.
Newly arrived survivors in Dallbow start with a Damaged 2 x 4 for self-defense and training.
| |||||||||||||||||||||||||||||||||||||||||||||||||||||||||||||||||||||||||||||||||||||||||||||||||
| Iron Pipe | ||||||||||||||||||||||||||||||||||||||||||||||||||||||||||||||||||||||||||||||||||||||||||||||||||
|
Equipment Slot: Weapon Level Required: 1 Weapon Type: Melee Body Damage Per Hit: 2.66 Attacks Per Sec: 0.58 (slow) Stun Duration: 1s Knockback Distance: 1m Noise Radius: 0m Surprise Attack Damage: 13.3 Effective DPS: Body: 1.54 Scrap Value: $24 |
The leading tool in transmission of water, gas, etcetera, these are common and quite sturdy! This Iron Pipe will do great for attacking any infected and will certainly put a hurting on them. Remember, aim for the brain!
| |||||||||||||||||||||||||||||||||||||||||||||||||||||||||||||||||||||||||||||||||||||||||||||||||
| Baseball Bat | ||||||||||||||||||||||||||||||||||||||||||||||||||||||||||||||||||||||||||||||||||||||||||||||||||
|
Equipment Slot: Weapon Level Required: 3 Weapon Type: Melee Body Damage Per Hit: 2.5 Attacks Per Sec: 0.67 (medium) Stun Duration: 0.75s Knockback Distance: 0.75m Noise Radius: 0m Surprise Attack Damage: 12.5 Effective DPS: Body: 1.68 Scrap Value: $32 |
A lightweight bat once used to send baseballs flying, is now frequently used as a club against weaker infected. The Baseball Bat is one of the first go-to weapons for early survivors, as it is silent and found in most households.
| |||||||||||||||||||||||||||||||||||||||||||||||||||||||||||||||||||||||||||||||||||||||||||||||||
| Wrench | ||||||||||||||||||||||||||||||||||||||||||||||||||||||||||||||||||||||||||||||||||||||||||||||||||
|
Equipment Slot: Weapon Level Required: 3 Weapon Type: Melee Body Damage Per Hit: 3 Attacks Per Sec: 0.67 (medium) Stun Duration: 0.75s Knockback Distance: 0.75m Noise Radius: 0m Surprise Attack Damage: 15 Effective DPS: Body: 2.01 Scrap Value: $32 |
Heavy-duty monkey wrench found in most homes and maintenance rooms of buildings. Once used to repair and maintain, this tool now functions to leave a serious head trauma into whomever it strikes.
| |||||||||||||||||||||||||||||||||||||||||||||||||||||||||||||||||||||||||||||||||||||||||||||||||
| Shovel | ||||||||||||||||||||||||||||||||||||||||||||||||||||||||||||||||||||||||||||||||||||||||||||||||||
|
Equipment Slot: Weapon Level Required: 5 Weapon Type: Melee Body Damage Per Hit: 3 Attacks Per Sec: 0.67 (medium) Stun Duration: 0.75s Knockback Distance: 0.75m Noise Radius: 0m Surprise Attack Damage: 15 Effective DPS: Body: 2.01 Scrap Value: $40 |
Once used to bury the dead, the shovel is now used to send them back to their grave. This amazing tool, sometimes referred to as the 'salt removal tool', is a great, improvised weapon for surviving this apocalypse.
| |||||||||||||||||||||||||||||||||||||||||||||||||||||||||||||||||||||||||||||||||||||||||||||||||
| Crowbar | ||||||||||||||||||||||||||||||||||||||||||||||||||||||||||||||||||||||||||||||||||||||||||||||||||
|
Equipment Slot: Weapon Level Required: 5 Weapon Type: Melee Body Damage Per Hit: 3.5 Attacks Per Sec: 0.67 (medium) Stun Duration: 0.75s Knockback Distance: 0.75m Noise Radius: 0m Surprise Attack Damage: 17.5 Effective DPS: Body: 2.35 Scrap Value: $40 |
Designed to open doors, crates, and to lift objects, the crowbar is now used to pry zombies' jaws off and rip them away, or to smash their skulls and bones to pieces. A fast, lightweight weapon fit for any survivor.
| |||||||||||||||||||||||||||||||||||||||||||||||||||||||||||||||||||||||||||||||||||||||||||||||||
| Barbed Bat | ||||||||||||||||||||||||||||||||||||||||||||||||||||||||||||||||||||||||||||||||||||||||||||||||||
|
Equipment Slot: Weapon Level Required: 10 Weapon Type: Melee Body Damage Per Hit: 3.5 Attacks Per Sec: 0.67 (medium) Stun Duration: 0.75s Knockback Distance: 0.75m Noise Radius: 0m Surprise Attack Damage: 17.5 Effective DPS: Body: 2.35 Scrap Value: $60 |
An improvised weapon popular among zombie hunters due to its appearance in many zombie movies. There's nothing more satisfying than a barbed wire-wrapped baseball bat slamming hard against the craniums of both zombies and humans alike. Better yet is the nasty, nasty splatter it leaves.
| |||||||||||||||||||||||||||||||||||||||||||||||||||||||||||||||||||||||||||||||||||||||||||||||||
| Pick Axe | ||||||||||||||||||||||||||||||||||||||||||||||||||||||||||||||||||||||||||||||||||||||||||||||||||
 Equipment Slot: Weapon Level Required: 10 Weapon Type: Melee Body Damage Per Hit: 4 Attacks Per Sec: 0.67 (medium) Stun Duration: 0.75s Knockback Distance: 0.75m Noise Radius: 0m Surprise Attack Damage: 20 Effective DPS: Body: 2.68 Scrap Value: $60 |
A tool used by hardworking miners in the normal days, now a weapon of destruction against any human or infected that stand in its path. Ready your pickaxes, boys and girls.
| |||||||||||||||||||||||||||||||||||||||||||||||||||||||||||||||||||||||||||||||||||||||||||||||||
| Nail Bat | ||||||||||||||||||||||||||||||||||||||||||||||||||||||||||||||||||||||||||||||||||||||||||||||||||
|
Equipment Slot: Weapon Level Required: 15 Weapon Type: Melee Body Damage Per Hit: 4.5 Attacks Per Sec: 0.67 (medium) Stun Duration: 0.75s Knockback Distance: 0.75m Noise Radius: 0m Surprise Attack Damage: 22.5 Effective DPS: Body: 3.02 Scrap Value: $80 |
Once a tool used for a good game of baseball, now a deadly weapon with sharp, deadly nails puncturing the wood. A hit from this would mash the brain of any infected that dare stand in it's path.
| |||||||||||||||||||||||||||||||||||||||||||||||||||||||||||||||||||||||||||||||||||||||||||||||||
| Axe | ||||||||||||||||||||||||||||||||||||||||||||||||||||||||||||||||||||||||||||||||||||||||||||||||||
 Equipment Slot: Weapon Level Required: 15 Weapon Type: Melee Body Damage Per Hit: 5 Attacks Per Sec: 0.67 (medium) Stun Duration: 0.75s Knockback Distance: 0.75m Noise Radius: 0m Surprise Attack Damage: 25 Effective DPS: Body: 3.35 Scrap Value: $80 |
Arms and legs going once, going twice, sold to the survivor wielding this beautiful fire axe! A tool used by firefighters in the old world now used to sever limbs from the undead and sometimes even the living. Any survivor yielding this weapon will have satisfying results.
| |||||||||||||||||||||||||||||||||||||||||||||||||||||||||||||||||||||||||||||||||||||||||||||||||
| Sledge Hammer | ||||||||||||||||||||||||||||||||||||||||||||||||||||||||||||||||||||||||||||||||||||||||||||||||||
|
Equipment Slot: Weapon Level Required: 20 Weapon Type: Melee Body Damage Per Hit: 6.65 Attacks Per Sec: 0.58 (slow) Stun Duration: 1s Knockback Distance: 1m Noise Radius: 0m Surprise Attack Damage: 33.25 Effective DPS: Body: 3.86 Scrap Value: $100 |
Once a tool used for smashing rocks, walls, concrete, etcetera, it has now a powerful alternative weapon in this new apocalyptic world. It is capable of spreading the force over a large area of impact to inflict maximum damage, leaving your foes' skulls a nice red slush.
Weighing in on a hefty 15-pounds, this particular brand of Sledge Hammer is typically only used by those with a lot of strength or a lot of experience in melee.
| |||||||||||||||||||||||||||||||||||||||||||||||||||||||||||||||||||||||||||||||||||||||||||||||||
| Machete | ||||||||||||||||||||||||||||||||||||||||||||||||||||||||||||||||||||||||||||||||||||||||||||||||||
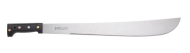 Equipment Slot: Weapon Level Required: 25 Weapon Type: Melee Body Damage Per Hit: 4.68 Attacks Per Sec: 0.78 (fast) Stun Duration: 0.64s Knockback Distance: 0.64m Noise Radius: 0m Surprise Attack Damage: 23.38 Effective DPS: Body: 3.65 Scrap Value: $120 |
A long, cheap and deadly blade of Latin American design which is very effective for clearing vegetation and zombies alike. Being the most classical zombie decapitator, this weapon is a popular choice within experienced zombie hunter circles.
| |||||||||||||||||||||||||||||||||||||||||||||||||||||||||||||||||||||||||||||||||||||||||||||||||
| Longsword | ||||||||||||||||||||||||||||||||||||||||||||||||||||||||||||||||||||||||||||||||||||||||||||||||||
 Equipment Slot: Weapon Level Required: 30 Weapon Type: Melee Body Damage Per Hit: 6 Attacks Per Sec: 0.67 (medium) Stun Duration: 0.75s Knockback Distance: 0.75m Noise Radius: 0m Surprise Attack Damage: 30 Effective DPS: Body: 4.02 Scrap Value: $140 |
Throughout the regions of the city, various survivors have finally uncovered hidden or lost storages of antique shops. Among the various trinkets and weapons found, the Longsword appeared within those surviving once again. With a further reach than other melee weapons, the Longsword boasts a deadly sharp edge and reach.
| |||||||||||||||||||||||||||||||||||||||||||||||||||||||||||||||||||||||||||||||||||||||||||||||||
| War Hammer | ||||||||||||||||||||||||||||||||||||||||||||||||||||||||||||||||||||||||||||||||||||||||||||||||||
|
Equipment Slot: Weapon Level Required: 35 Weapon Type: Melee Body Damage Per Hit: 8.65 Attacks Per Sec: 0.58 (slow) Stun Duration: 1s Knockback Distance: 1m Noise Radius: 0m Surprise Attack Damage: 43.23 Effective DPS: Body: 5.02 Scrap Value: $160 |
The War Hammer has been a large two-handed blunt weapon that has been in use as early as the 2nd Century, and, in the 15th and 16th, began to also be decorated and crafted with more expensive materials. And while it's use has mostly ended on smashing sentient, humane skulls, it is now used in the hands in crunching the flesh and bones of the unrelenting undead.
| |||||||||||||||||||||||||||||||||||||||||||||||||||||||||||||||||||||||||||||||||||||||||||||||||
| Dane Axe | ||||||||||||||||||||||||||||||||||||||||||||||||||||||||||||||||||||||||||||||||||||||||||||||||||
|
Equipment Slot: Weapon Level Required: 40 Weapon Type: Melee Body Damage Per Hit: 7 Attacks Per Sec: 0.67 (medium) Stun Duration: 0.75s Knockback Distance: 0.75m Noise Radius: 0m Surprise Attack Damage: 35 Effective DPS: Body: 4.69 Scrap Value: $180 |
An early type of Battle Axe used by Vikings and those within the Middle Ages, the Dane is, quite frankly, a pretty good meat cleaver... Survivors know exactly what this means.
| |||||||||||||||||||||||||||||||||||||||||||||||||||||||||||||||||||||||||||||||||||||||||||||||||
| Wakizashi | ||||||||||||||||||||||||||||||||||||||||||||||||||||||||||||||||||||||||||||||||||||||||||||||||||
|
Equipment Slot: Weapon Level Required: 45 Weapon Type: Melee Body Damage Per Hit: 6.8 Attacks Per Sec: 0.78 (fast) Stun Duration: 0.64s Knockback Distance: 0.64m Noise Radius: 0m Surprise Attack Damage: 34 Effective DPS: Body: 5.3 Scrap Value: $200 |
One of the Traditional swords worn by Samurai, the weapon finds itself in Palehaven in use of a great cause: Destroying the undead with swift, precise swings of crafted steel.
| |||||||||||||||||||||||||||||||||||||||||||||||||||||||||||||||||||||||||||||||||||||||||||||||||
| Katana | ||||||||||||||||||||||||||||||||||||||||||||||||||||||||||||||||||||||||||||||||||||||||||||||||||
|
Equipment Slot: Weapon Level Required: 50 Weapon Type: Melee Body Damage Per Hit: 8 Attacks Per Sec: 0.67 (medium) Stun Duration: 0.75s Knockback Distance: 0.75m Noise Radius: 0m Surprise Attack Damage: 40 Effective DPS: Body: 5.36 Scrap Value: $220 |
Another Traditional sword used by the Samurai, also is in now widespread use in Palehaven, this time, with a greater reach, and an even more deadly cut than it's shorter brother.
| |||||||||||||||||||||||||||||||||||||||||||||||||||||||||||||||||||||||||||||||||||||||||||||||||
| Mace | ||||||||||||||||||||||||||||||||||||||||||||||||||||||||||||||||||||||||||||||||||||||||||||||||||
|
Equipment Slot: Weapon Level Required: 50 Weapon Type: Melee Body Damage Per Hit: 10.64 Attacks Per Sec: 0.58 (slow) Stun Duration: 1s Knockback Distance: 1m Noise Radius: 0m Surprise Attack Damage: 53.2 Effective DPS: Body: 6.17 Scrap Value: $220 |
Ever wanted to smash a zombie's head in true medieval style? Here's your chance. With a rather terrifying end of steel, the undead will surely regret ever getting close enough to meet its force.
| |||||||||||||||||||||||||||||||||||||||||||||||||||||||||||||||||||||||||||||||||||||||||||||||||
Available Upgrades[]
See also: Upgrades (Attachments).
| Name | Level | Effects | Source |
|---|---|---|---|
| [ Makeshift Melee Counterweight ] | 1 | +8% Weapon Attack Speed -1% Movement Speed |
Non-tradeable, craftable after reading [ Council's Memo ] |
| [ Iron Counterweight ] | 30 | +10% Weapon Attack Speed -1% Movement Speed |
Tradeable, lootable in level 30+ zones |
| [ Steel Counterweight ] | 40 | +15% Weapon Attack Speed | Tradeable, lootable in level 40+ zones |
| [ Titanium Counterweight ] | 50 | +20% Weapon Attack Speed | Tradeable, lootable in level 50 zones |