Open World Map

The Open World represents the world that all players play in. It consists of a large, 30 by 18 cells, with Palehaven city divided into eighteen districts (formerly towns).
The player is fully free to explore the entire world, with no physical restriction on travel or movement (aside from the local infected threat). Players can use their car to fast travel between the three outposts.
The various areas of the map offer higher levels of difficulty, with areas to the West of the town (left side of the map) being the easiest at level 1, and with further east zones becoming more difficult, maxing out at level 50. Higher difficulty zones present more dangerous and numerous infected and mutated, but higher EXP gains and loot opportunities.
The world map is procedurally regenerated every 7 days.
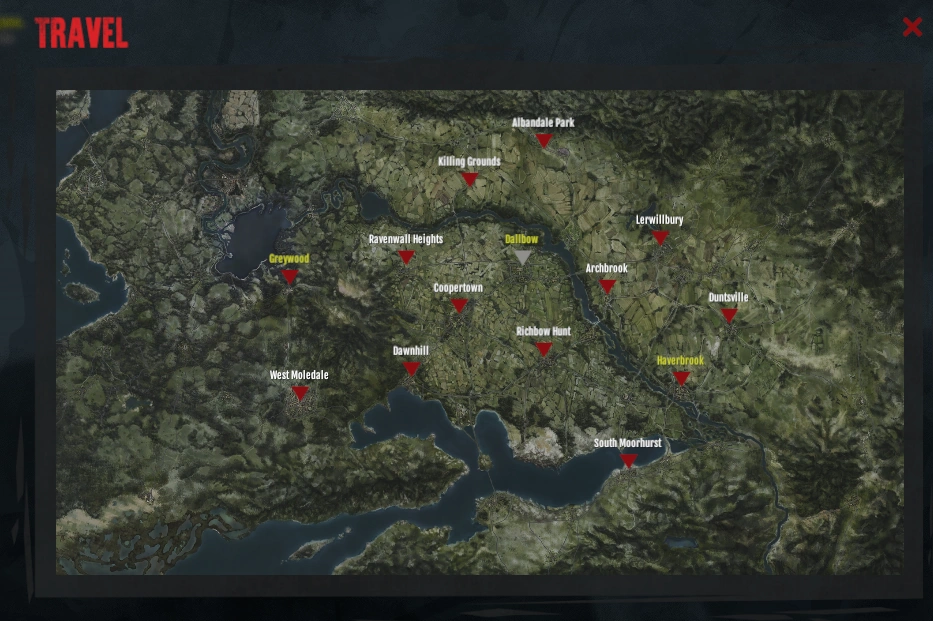
Outposts
Three of the districts, represented on the map in yellow, are outpost zones, with one central building being the outpost. These districts being Dallbow, Haverbrook and Greywood. While the streets are just as dangerous as any other district, the outpost itself offers a safe haven for players to escape Stalker, store items, engage in quests or to buy or sell in the market.
Every four hours, one of the outposts will come under attack by hoards of infected. While during the attack the infected cannot physically enter the outpost, they will attack the exterior door. When an attack occurs, a large alarm siren blares and the adjacent cells to the outpost will change into an orange colour, with infected spawning in all adjacent zones and charging at the outpost. Failure to defend the outpost will result in it being 'abandoned' for one hour, with all NPCs except the Trader being unavailable, and all rooms other than the lobby being swarmed with infected.
PvP Zone
Two 2x2 size red colour PvP Combat zones exist. One is located located in Dawnhill and the other one in Greywood. Players are immediately allowed to engage in a PvP open combat when entering either the zone in the city. However, PvP will be disabled when players are inside the buildings.
There is currently no additional loot or EXP available within the PvP zones, so the main reasons of entering the zones are scoring points towards your personal PvP score, or for daily missions that happen to be within a zone. Players may travel safely within PvP zones without the fear of being exposed to unwanted PvP activity by going into Lobby and choosing "Play Solo" option.
| Pre Open World Map (2018-March, 2020) | ||||||||||||||||||||||||||||||||||||||||||||||||||||||||||||||||||||||||||||||||||||||||||||||||||||||||||||||||||||||||||||||||||||||||||||||||||||||||||||||||||||||||||||||||||||||||||||||||||||||||||||||||||
|---|---|---|---|---|---|---|---|---|---|---|---|---|---|---|---|---|---|---|---|---|---|---|---|---|---|---|---|---|---|---|---|---|---|---|---|---|---|---|---|---|---|---|---|---|---|---|---|---|---|---|---|---|---|---|---|---|---|---|---|---|---|---|---|---|---|---|---|---|---|---|---|---|---|---|---|---|---|---|---|---|---|---|---|---|---|---|---|---|---|---|---|---|---|---|---|---|---|---|---|---|---|---|---|---|---|---|---|---|---|---|---|---|---|---|---|---|---|---|---|---|---|---|---|---|---|---|---|---|---|---|---|---|---|---|---|---|---|---|---|---|---|---|---|---|---|---|---|---|---|---|---|---|---|---|---|---|---|---|---|---|---|---|---|---|---|---|---|---|---|---|---|---|---|---|---|---|---|---|---|---|---|---|---|---|---|---|---|---|---|---|---|---|---|---|---|---|---|---|---|---|---|---|---|---|---|---|---|---|---|---|
Early Access MapThis map represented the former world of Dead Frontier 2. The world map was divided into a series of 15 towns or cities, each of these locations could be travelled too via a car or on foot if you lacked fuel to reach the destination. The various different locations were each defined by their own unique layout, with higher level areas introducing new infected and mutated bosses. The various towns had varying levels, representing the difficulty of the town, with higher difficulty towns presenting more numerous and more powerful infected. The difficulty of all towns changed every day with the exception of Outpost zones, and the standard towns of Archbrook and Coopertown. Three of the towns, Dallbow, Haverbrook and Greywood, are Outposts, as highlighted by their town name being written in yellow on the world map. While the streets of Outposts are just as dangerous as a regular town of the same level, they do offer a permanent dedicated Outpost, which serves as a safe haven for you to store your items, pick up quests or to buy and sell items on the market. Every day these outposts will come under attack by hoards of infected, with each outpost being attacked once a day. While the infected cannot physically enter the outpost, they will attack the exterior door. If the outpost is overrun, the outpost will be abandoned for one hour, with all quest giving NPCs being unavailable, although the trader will still operate. For more information on outpost attacks, click here. When you place your cursor over a location, you can see the recommended level of the area. If you place your cursor over another city (such as to travel to it), apart from the recommended level, you will see the amount of fuel needed to travel, and the energy and hydration you will consume travelling there. If cities are highlighted in red, it means you don't have enough fuel to travel to them. There will always be at least 2 zones of each level strip (5, 10, 15, 20, 25, 30), with the exception of Dallbow, which is the only level 1 zone.
Useful LocationsHospitals (x2 chances of finding medications) Police stations (x2 chance to find ammunition) Mechanical Places (x2 chance of finding vehicle parts and fuel) Comer and Sons (Lerwillbury) Mansions (2x chance of finding weapons(Unconfirmed)) This building is the ultimate endurance test for your character. It is a building that is always generated with more than 15 floors and, although the area is low level, it is always level 30, so it will be full of very powerful special infected. To close, the boss room does not need a key, but will present up to 3 bosses together (of bloody or burned variation, much more powerful), although only one will leave treasure at death. Early Access Map LocationsAlbandale Park 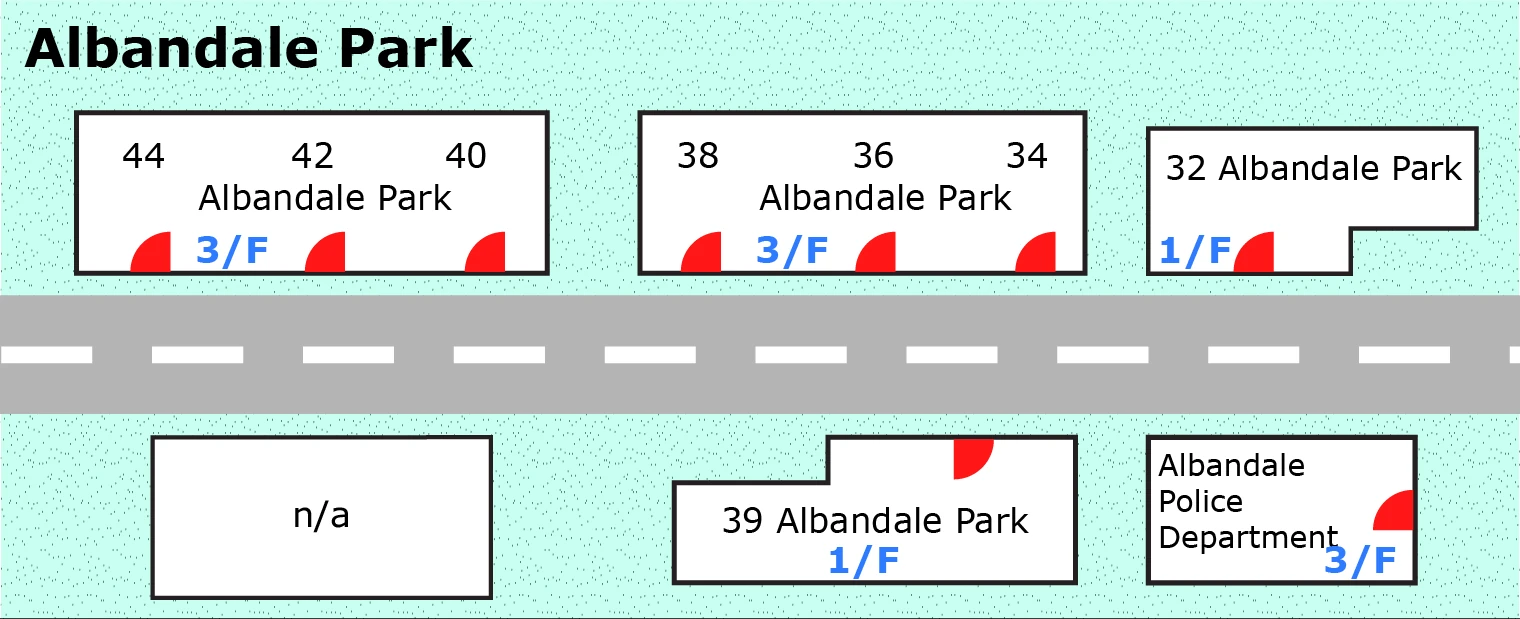 Archbrook   Coopertown  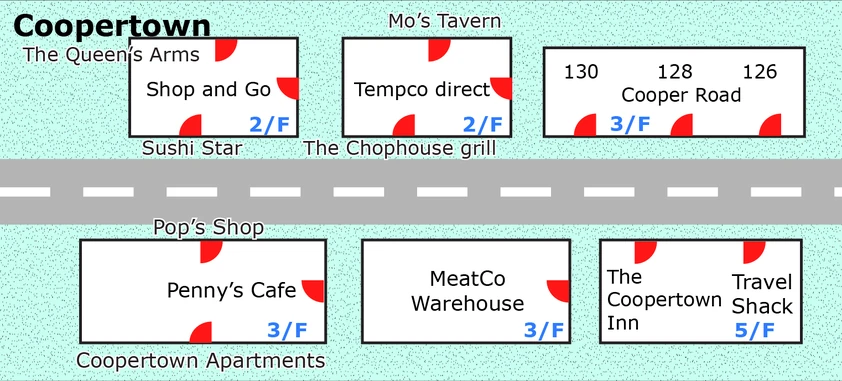 Dallbow 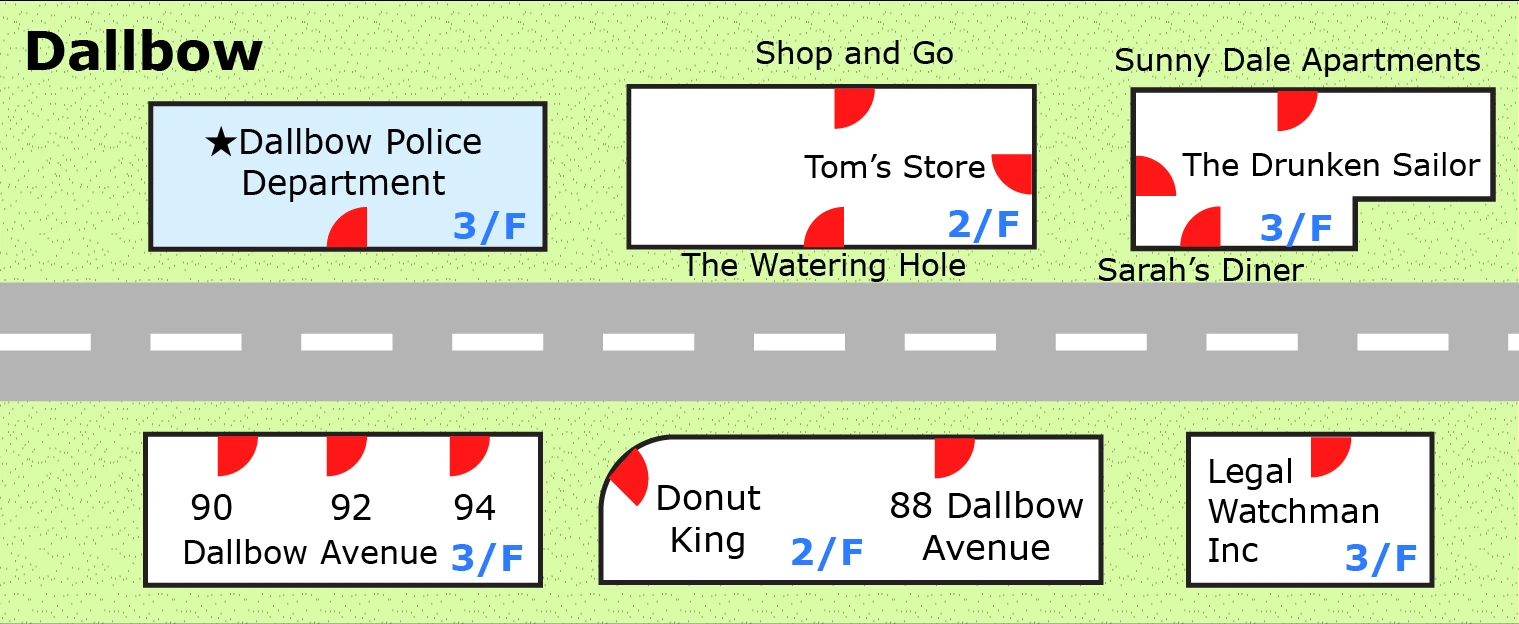 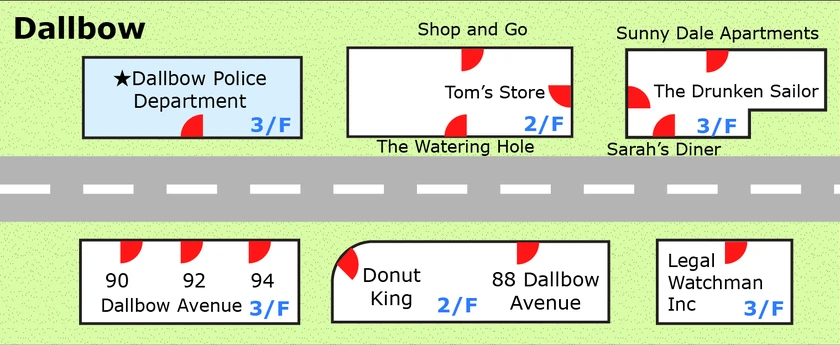 Dawnhill 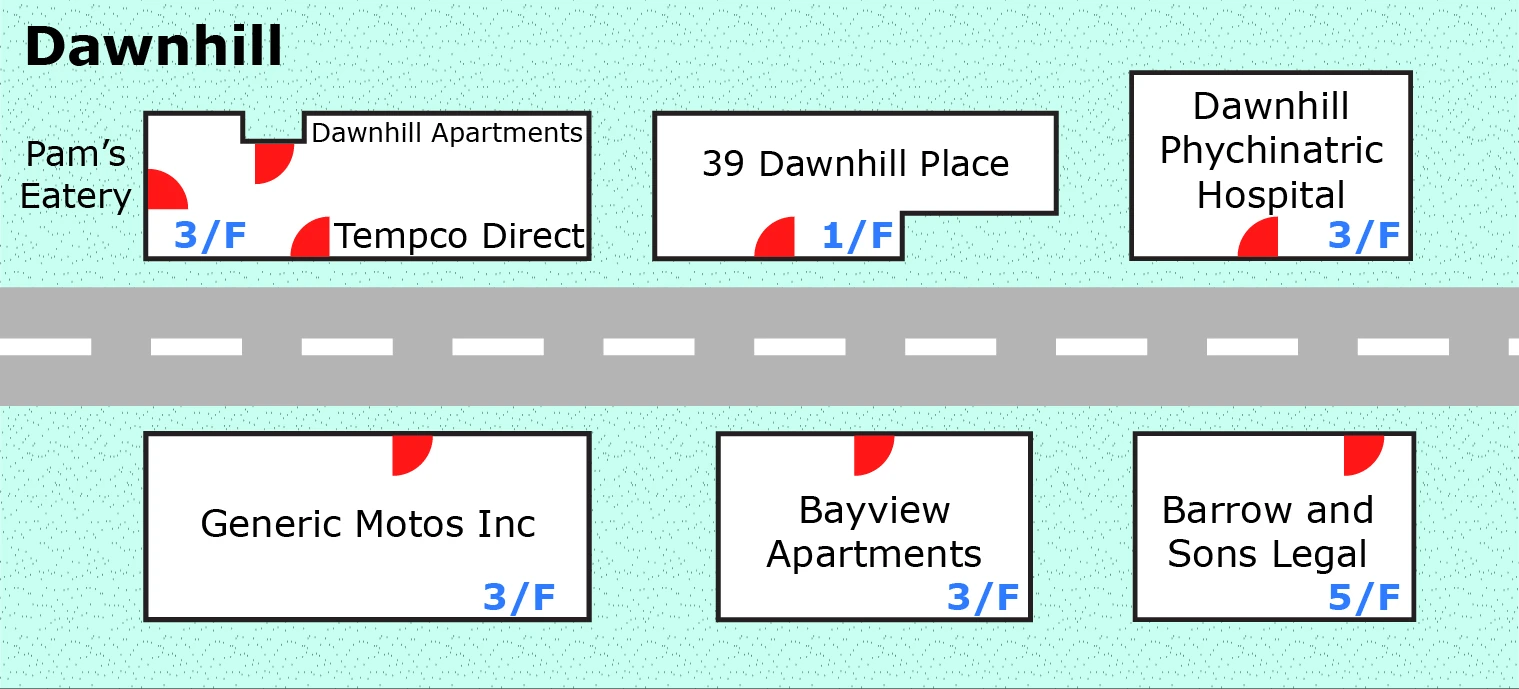 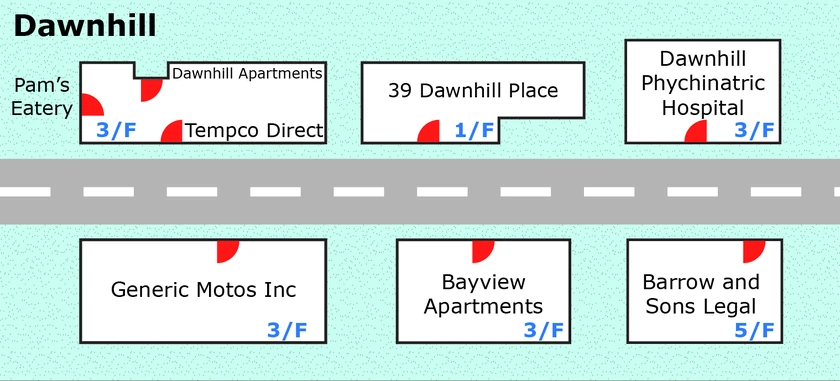 Duntsville   Greywood 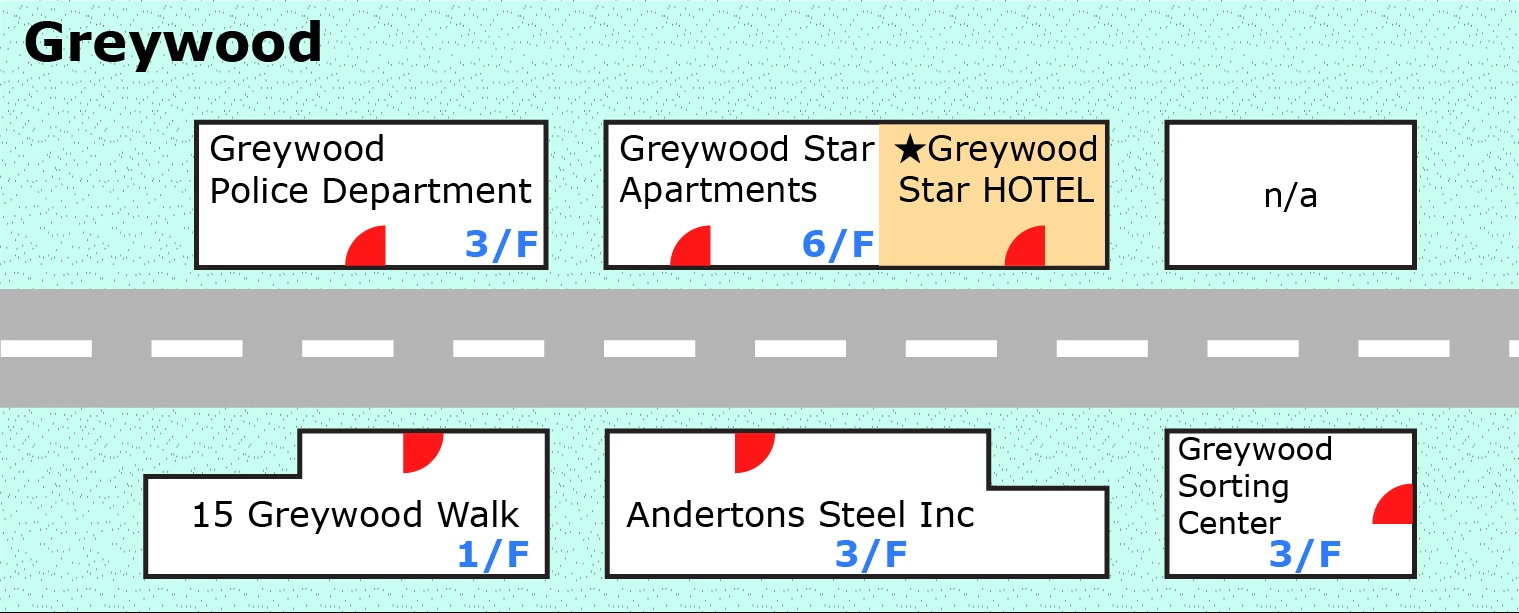  Haverbrook 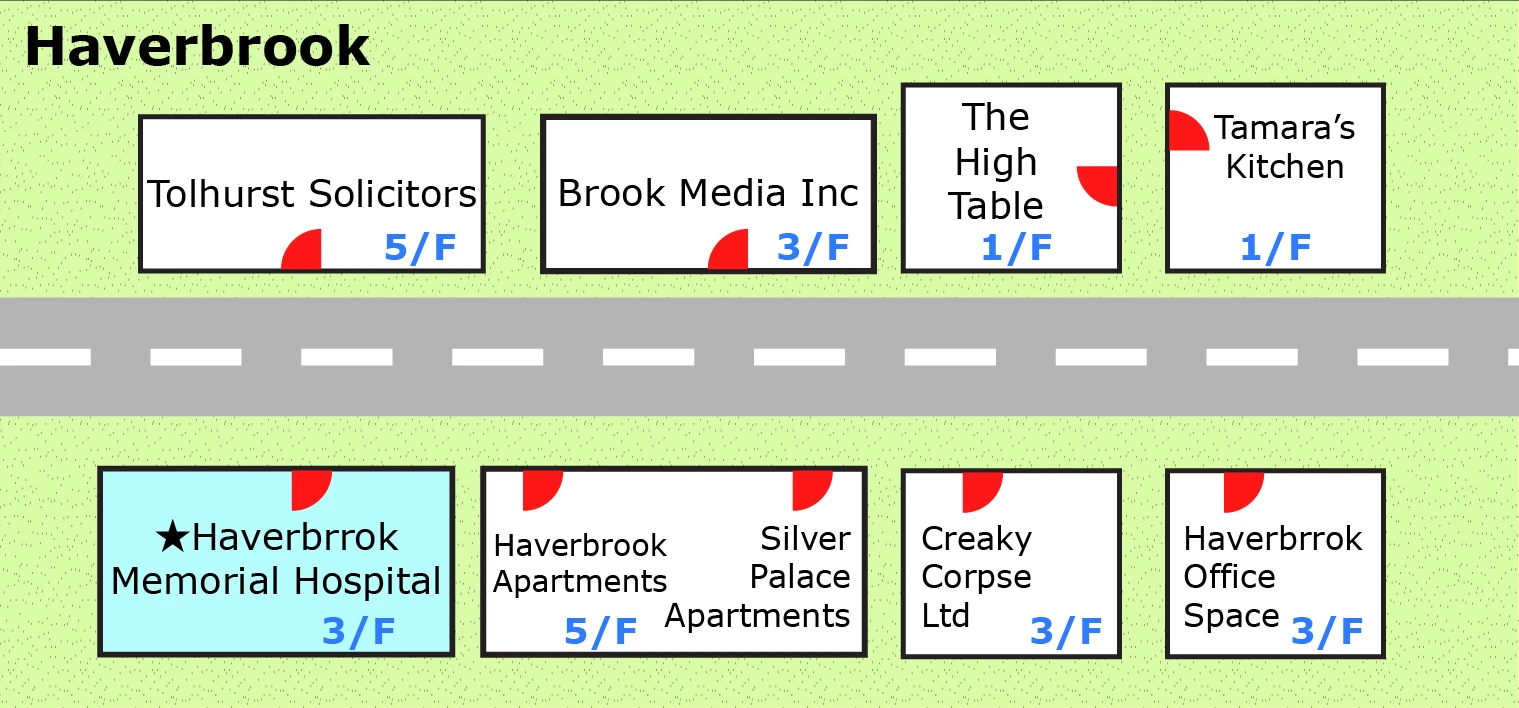 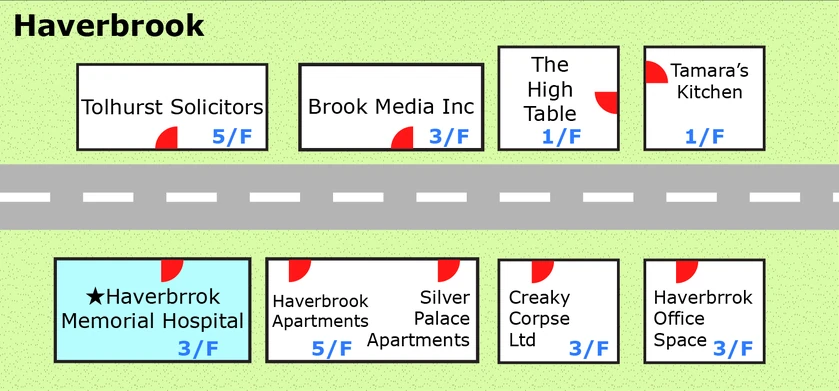 Lerwillbury 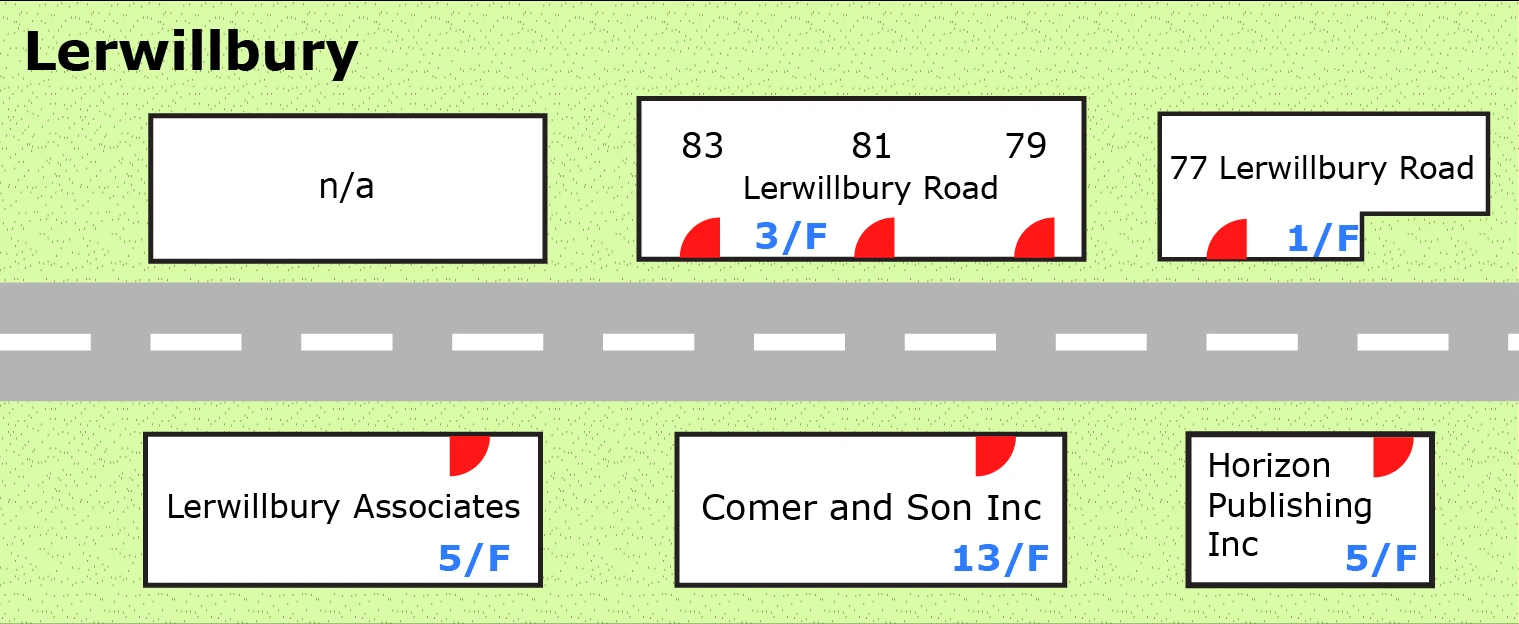 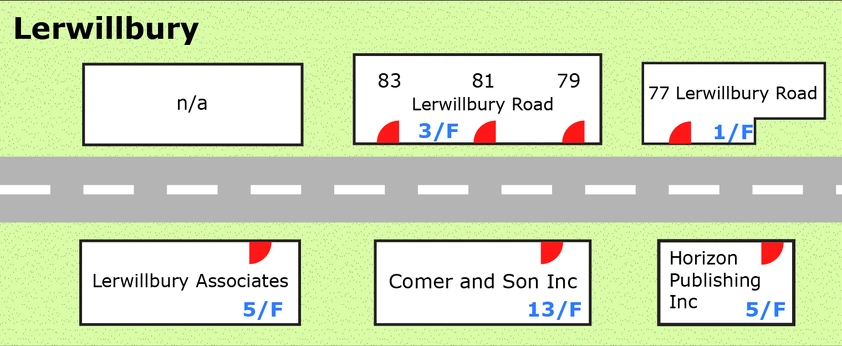 Ravenwall Heights 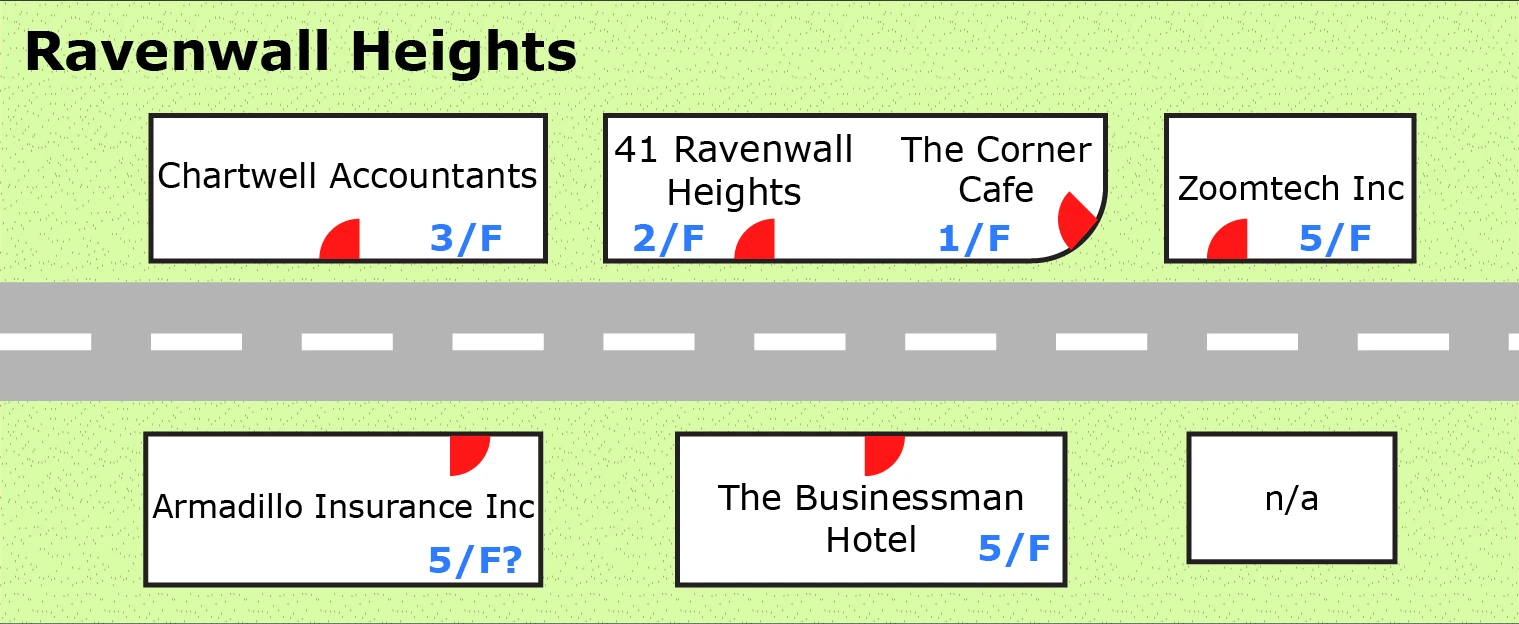 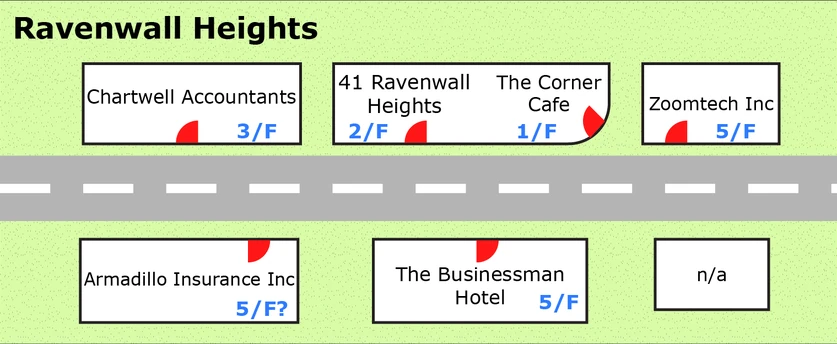 Richbow Hunt  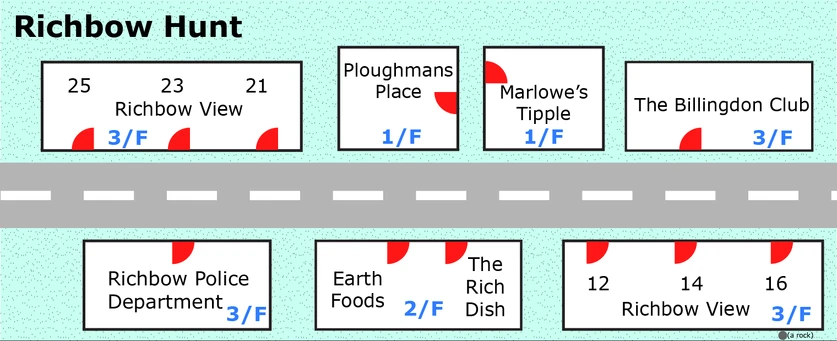 South Moorhurst  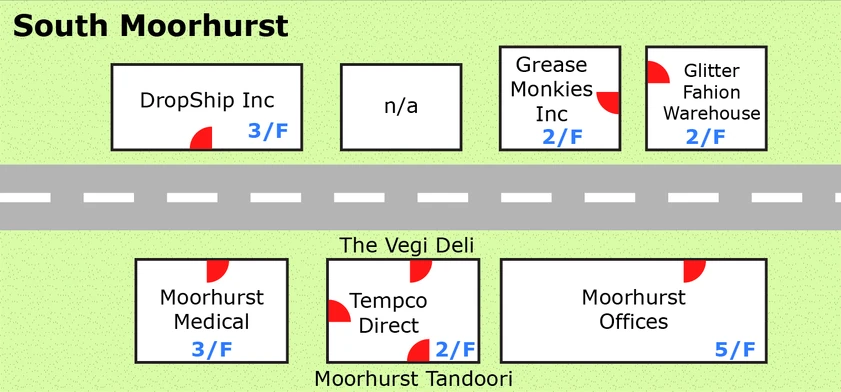 West Moledale 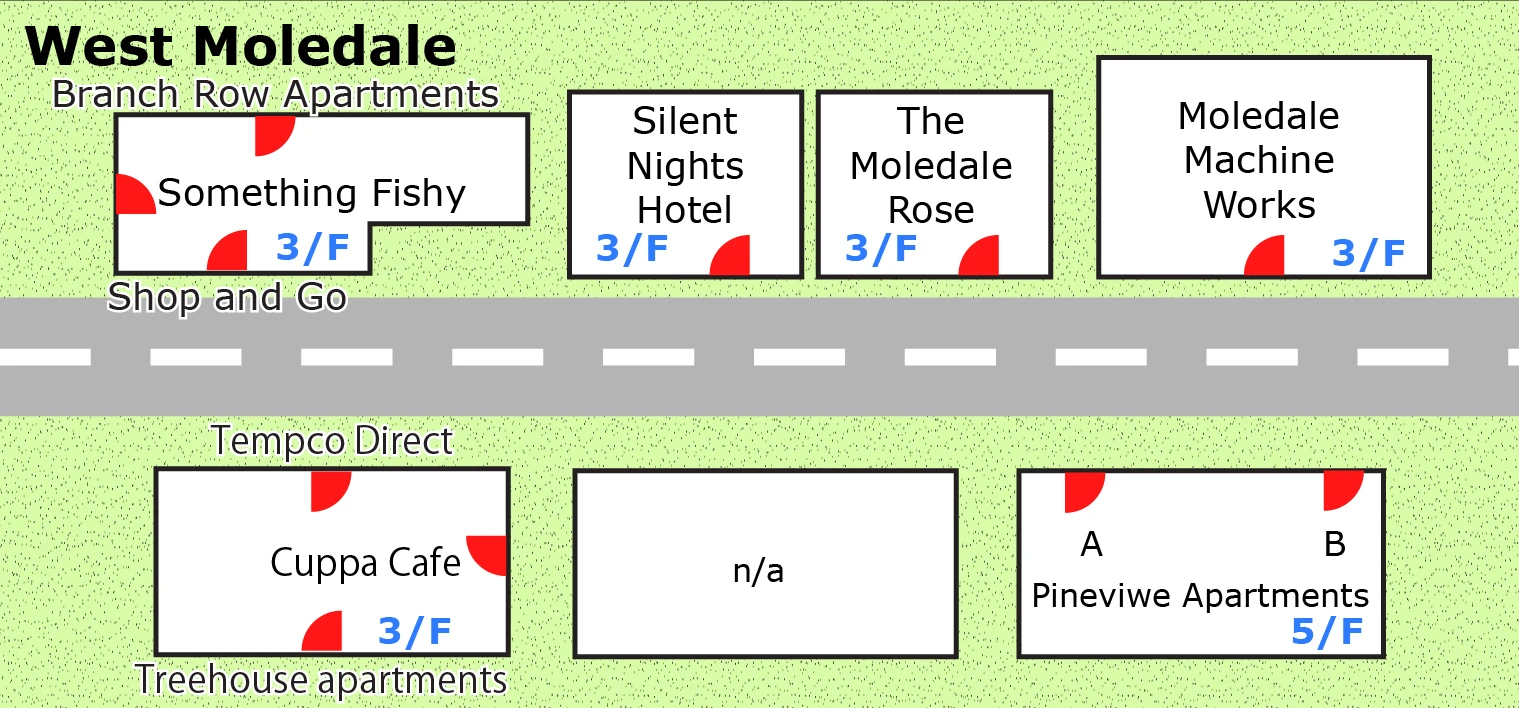 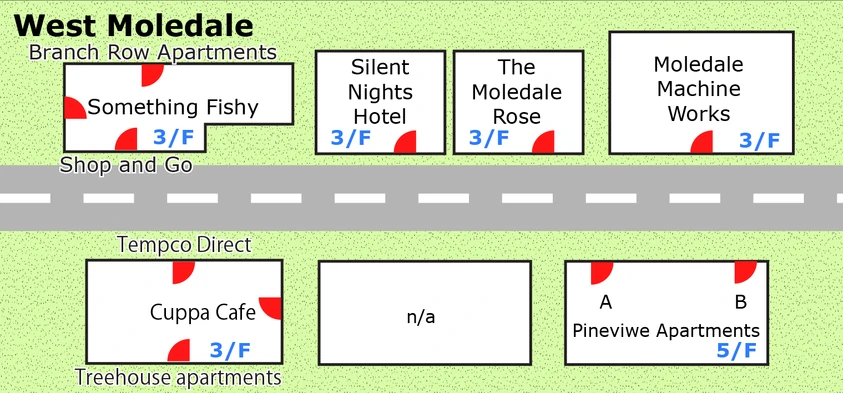 | ||||||||||||||||||||||||||||||||||||||||||||||||||||||||||||||||||||||||||||||||||||||||||||||||||||||||||||||||||||||||||||||||||||||||||||||||||||||||||||||||||||||||||||||||||||||||||||||||||||||||||||||||||